Have you ever been browsing an online store and a sudden newsletter popup appears, nudging you to subscribe? Whether you find them annoying or helpful, there’s no denying that newsletter popups are an effective marketing tool for businesses.
Running a successful WooCommerce store is about connecting with customers and offering a seamless shopping experience. Keep your audience informed about the latest deals, products, and content. A newsletter popup is highly effective for collecting email addresses and engaging customers.
This guide will help you add a newsletter popup in WooCommerce, whether you’re experienced or new to the platform. Enhance your digital marketing strategy with ease.
Understanding Newsletter Popups in WooCommerce
Let’s start by analyzing the newsletter popup and its significance as a crucial addition to your WooCommerce store. We’ll explore its impact on customer engagement, sales, and user experience.
What is a Newsletter Popup?
A newsletter popup is a small overlay window that appears on a website to encourage visitors to subscribe to an email newsletter. It typically includes a brief message, an email input field, and a “Subscribe” button.
The popup can either slide in from the side of the screen or overlay the entire website, drawing the visitor’s attention to the subscription offer.
Why is It Important to Have a Newsletter Popup in WooCommerce?
A newsletter popup is a powerful tool to increase customer engagement and drive sales for your WooCommerce store.
Here’s why:
- Boosts Email Sign-ups: By strategically placing a popup on your website, you can significantly increase your email subscriber list. Studies have shown that well-timed and well-designed popups can boost conversion rates by up to 10%.
- Targeted Marketing: Email marketing lets you directly communicate with your audience, sharing product updates, promotions, and personalized offers.
- Increased Sales: By nurturing your email list, you can drive repeat purchases and encourage customers to explore your product range.
- Enhanced Brand Loyalty: Regular communication through email newsletters helps build a strong brand relationship with your customers, fostering loyalty and trust.
The Impact of Newsletter Popups on Customer Engagement and Sales
Newsletter popups don’t just gather email addresses; they are a powerful tool for customer engagement and sales. They attract customers with promotions and make them return to shop more.
Discover the powerful impact they have on customer engagement and sales!
- Customer Capture: Newsletter popups effectively capture visitor information and build a subscriber base for targeted marketing.
- Increased Engagement: Popups catch attention and encourage visitors to subscribe, boosting interaction and overall engagement.
- Personalization Opportunities: Popups allow personalized content delivery, tailoring offers and information based on customer preferences.
- Sales Boost: Engaged subscribers are more likely to convert, contributing to increased sales through targeted promotions and exclusive deals.
- Data for Segmentation: Collected data from popups facilitates segmentation, enabling businesses to tailor marketing campaigns for specific customer segments.
- Effective Communication: Newsletters are a direct communication channel, informing customers about new products, promotions, and company updates.
- Brand Recall: Regular newsletters help reinforce brand recall. It ensures your brand stays top-of-mind for potential customers.
- Conversion Optimization: Well-timed and strategically placed popups contribute to optimized conversion rates by nudging visitors toward desired actions.
- Balancing User Experience: Implementing non-intrusive and well-designed popups ensures a positive user experience, which prevents potential irritation while maximizing benefits.
How to Add a Newsletter Popup in WooCommerce: Step-by-Step Guide
Now that we’ve established the importance of newsletter popups let’s learn how to add one to your WooCommerce store. In this step-by-step guide, we’ll show you how to create an eye-catching popup using the ShopLentor plugin, which is perfect for building popups that grab attention.
However, to make sure you’re collecting and managing emails effectively, you’ll also need an email marketing tool like FluentCRM or MailChimp.
For this guide, we’ll use FluentCRM, a powerful tool that integrates seamlessly with WooCommerce. You can easily manage your contacts and run targeted email campaigns. Let’s get started!
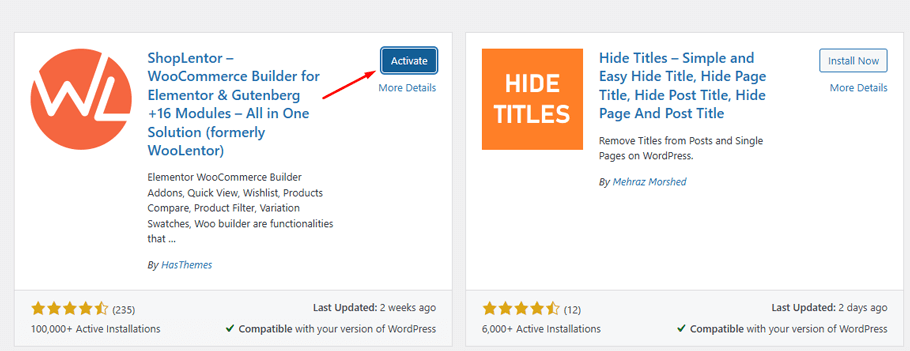
Step 1: Install and Activate ShopLentor
To install ShopLentor on WordPress, go to the Dashboard, Go to “Plugins,” and click “Add New.” Search for “ShopLentor,” then click “Install,” and finally, Activate the plugin.
You can also install ShopLentor Pro(formerly WooLentor) for additional features. For further information, read the article How to install WooLentor Pro.
Step 2: Access Popup Builder in ShopLentor
After successfully activating ShopLentor, navigate to the “ShopLentor” tab in your WordPress dashboard. Click on it to access the plugin.
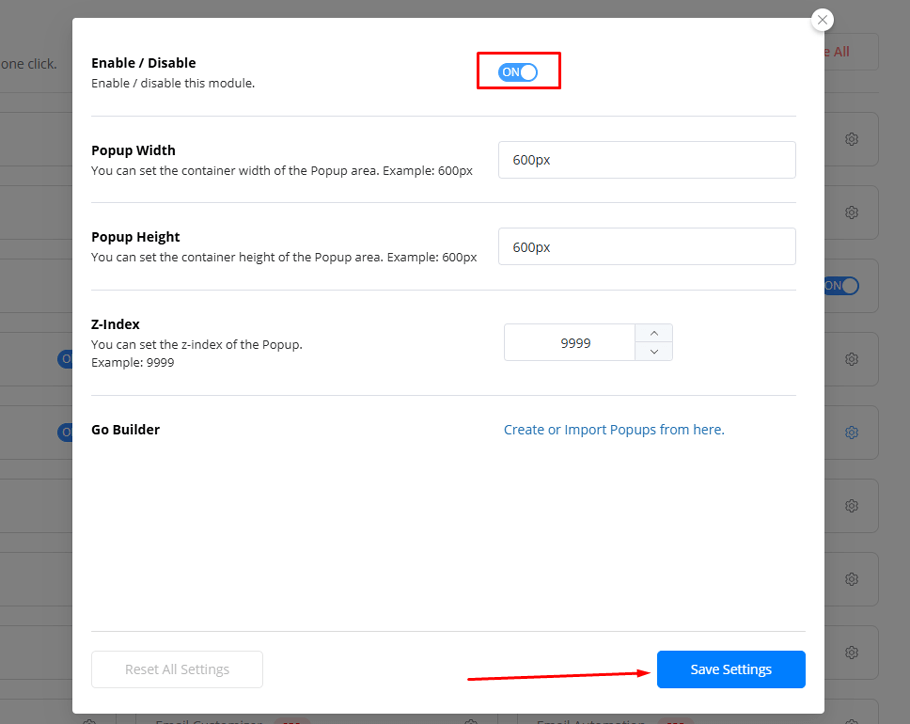
Go to the ShopLentor Setting. Click on the “Module” tab, Click on the ‘Popup Builder’ setting, and
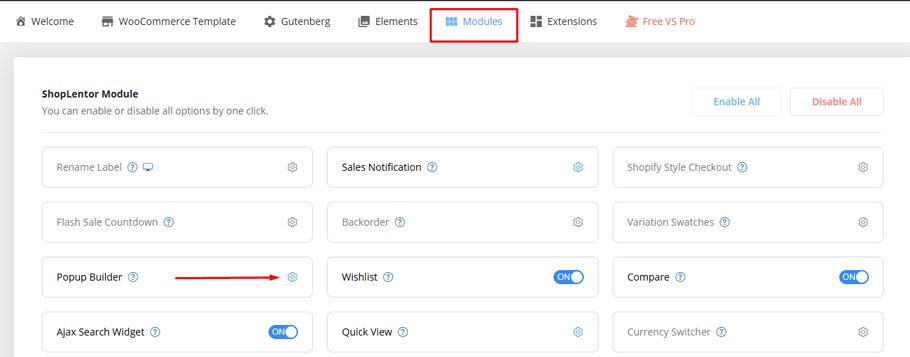
enable it. Click ‘Save Changes’ to confirm.
Step 3: Create Popup Templates
To create a Popup template for the Popup Builder module, go to Template Builder and select the popup from the menu bar. Click “Add New,”
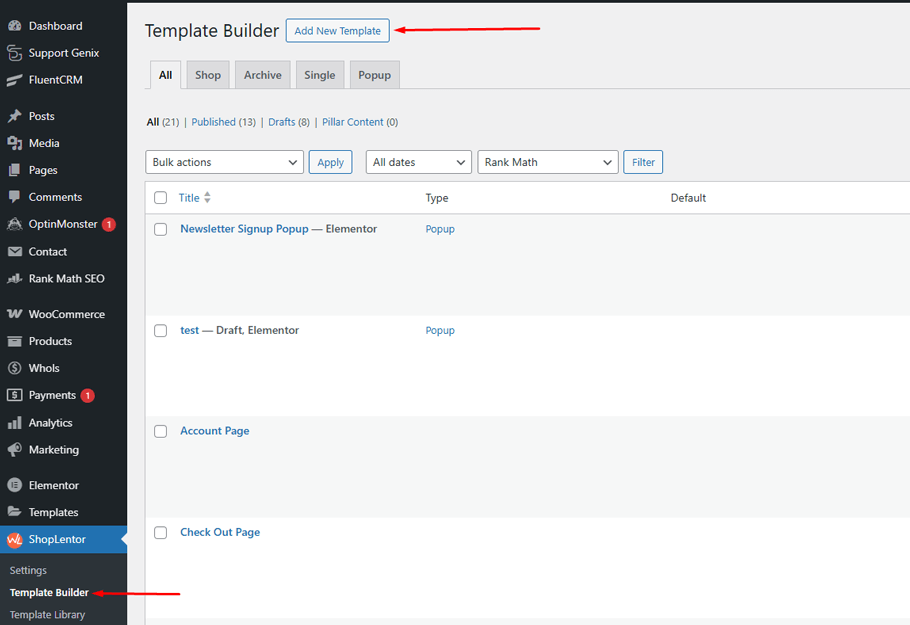
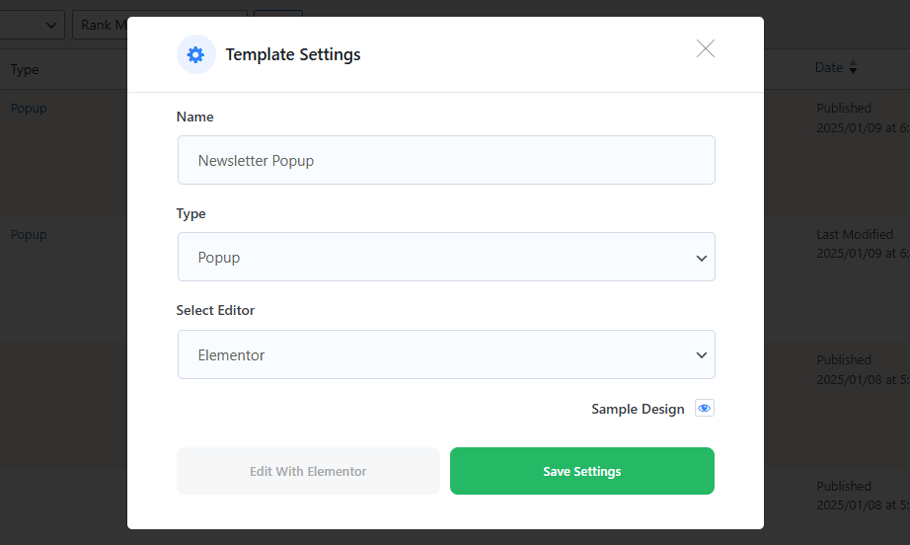
Write the name of your popup template, set “popup” as the type, and set the editor using the Elementor or Gutenberg Block options. Click on the Save Button.
Step 4: Design the Popup Template
You can choose your popup template by selecting a design from ‘Sample Design.’ or Save your selection by clicking ‘Save Settings.’
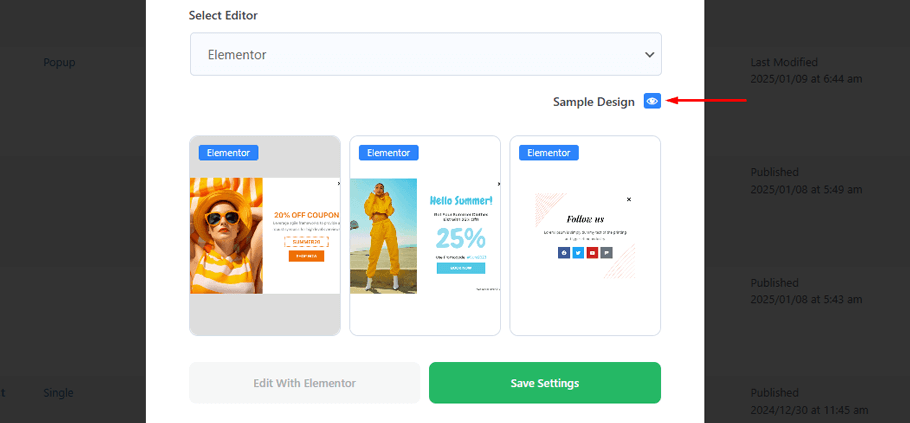
Access the Elementor edit screen by clicking ‘Edit with Elementor’ to adjust the layout, image, and text.
Step 5: Adding Newsletter form
Now that you’ve designed your popup with ShopLentor, it’s time to add your newsletter form to the popup. Here’s how to do it:
1. Install and Activate FluentCRM: First, ensure that FluentCRM is installed. If not, install the plugin.
- To install FluentCRM, first access your WordPress dashboard and locate the “Add Plugin” option.
- Once there, use the search function to find FluentCRM in the plugin directory.
- When you’ve found FluentCRM, click the “Install” button to begin the installation.
- After the installation, click “Activate” to enable FluentCRM on your WooCommerce site.
- The plugin will then be ready for use with your WordPress website.
2. Create a List and Tags (Optional):
Navigate to FluentCRM > Contact. This area helps in organizing and segmenting your email subscribers for targeted marketing campaigns
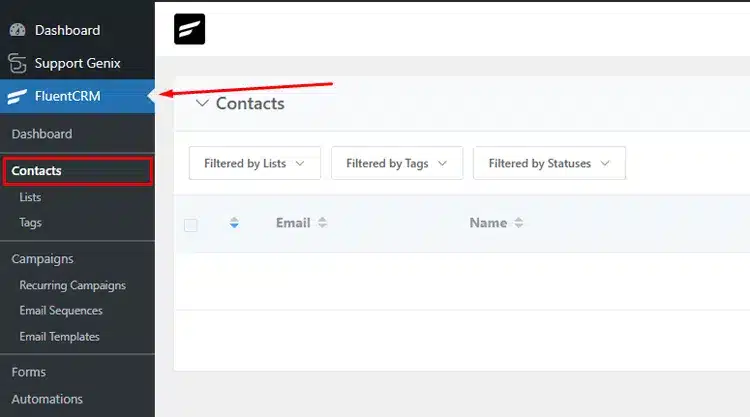
Click “Lists or Tags.”
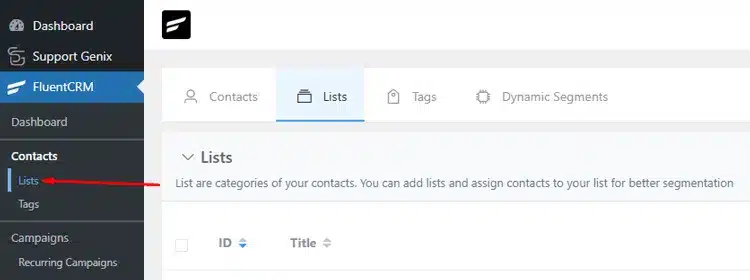
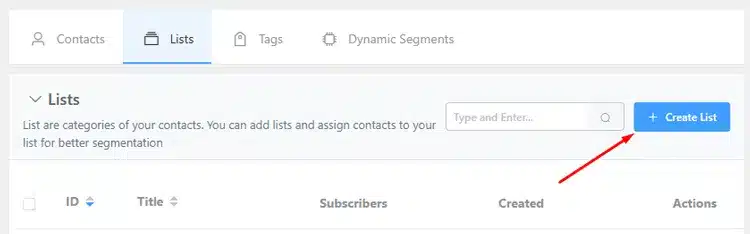
To create a List: Click “Create List”
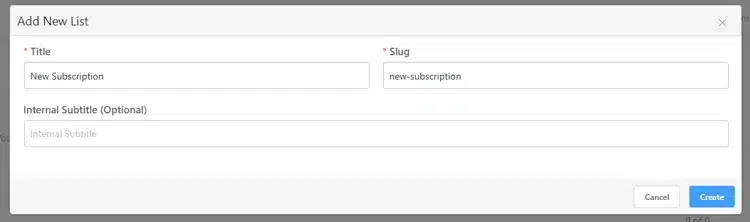
Enter Title and Slug to add new list, Internal Subtitle (optional) Click “Create”
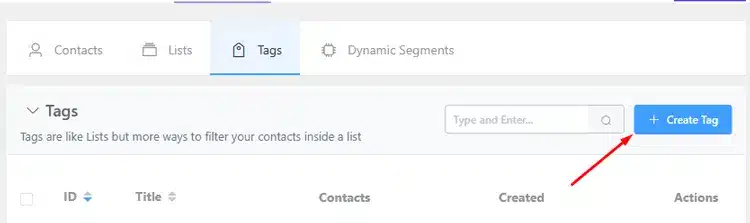
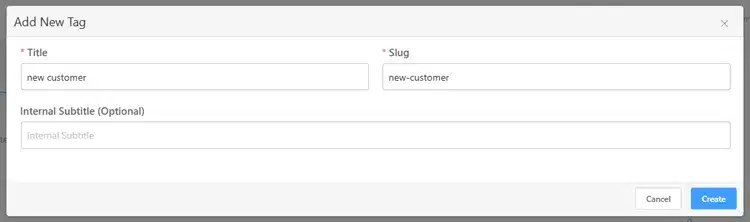
To create a Tag: Click “Create Tag”
Enter Title and Slug to add new Tag, Internal Subtitle (optional) Click “Create”
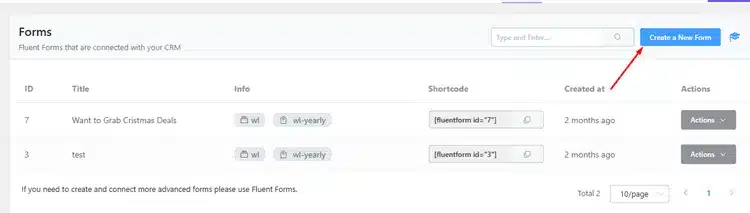
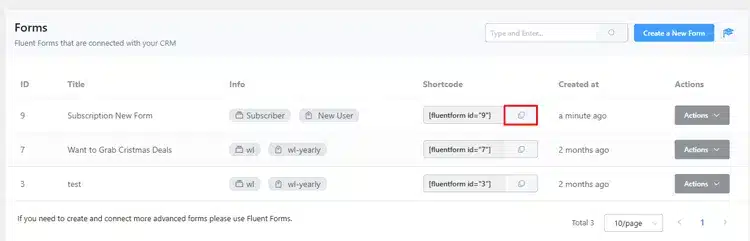
3. Create Your Newsletter Signup Form: Back on the FluentCRM, Choose the Forms option and

Click “Create a New Form.” You’ll be directed to a new form creation page.
Select a Template: FluentCRM offers various pre-built templates to get you started. Choose the one that best suits your needs.
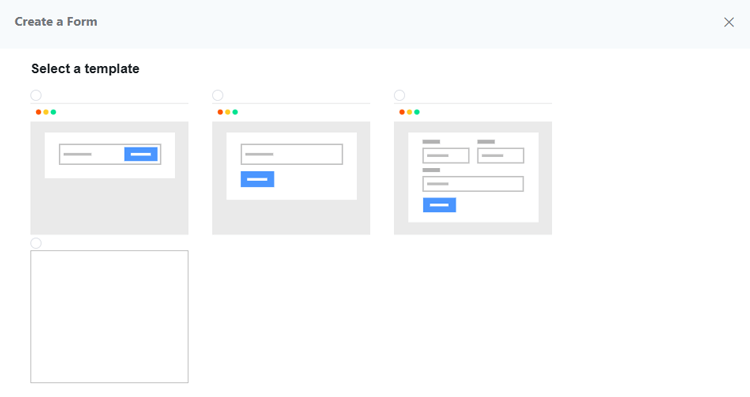
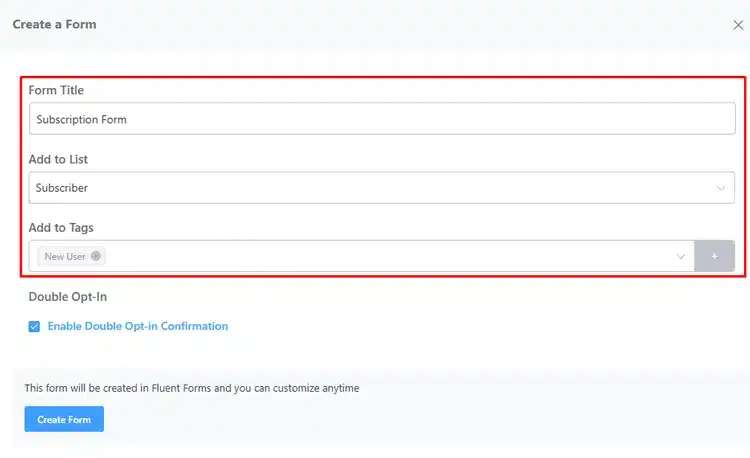
Create Forms: Click on “Create a New Form”. Select a template. Fill up “Form Title” , “Add to List” and Tags you have created.
Customize the Form (Optional): You can customize the form fields, add labels, and modify the design to match your popup template.
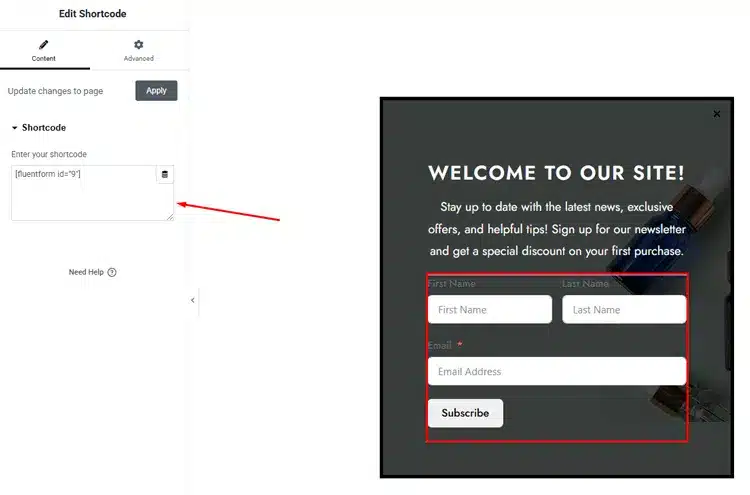
4. Copy the Shortcode: After your form is designed and ready, copy the shortcode for the form. It should look something like this:
5. Go to Popup Template Editor: Now, head over to the ShopLentor popup template editor. Here, you’ll need to paste the shortcode you copied from FluentCRM into the popup content area.
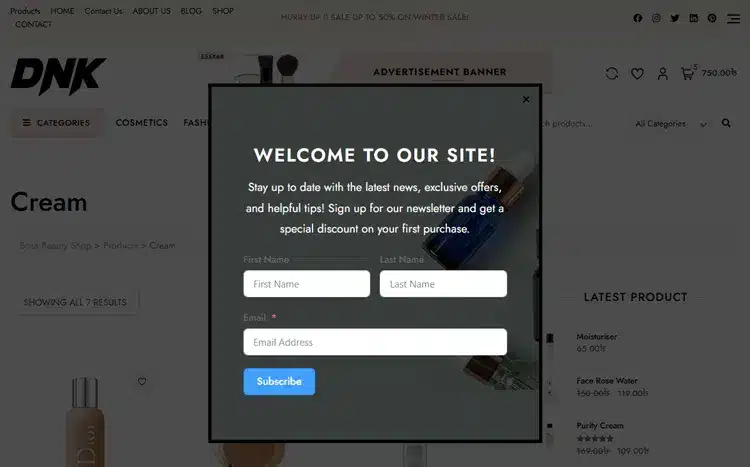
6. Save and Publish: Once everything is set up, click “Save and Publish” to make your newsletter popup live on your store.
Your newsletter signup popup is now integrated with FluentCRM. When visitors submit their email address through the popup, it will automatically be added to your FluentCRM list.
Step 6: Configure Popup Settings
To access more customization choices, visit the popup settings feature in Elementor. You can fine-tune the popup’s behavior and timing with condition settings here.
You can precisely control when and where your popups appear by setting up multiple conditions. These conditions can be applied globally or tailored to specific pages, providing comprehensive management options.
The trigger settings enable you to define the timing for the popup display, providing options such as page load, scroll, click, inactivity, or exit intent.
In the general settings section, you can explore customization choices for behavior. These include options like turning off page scroll, showing or hiding the close button, and enabling dismissal using the ESC key.
Best Practices for Creating an Effective Newsletter Popup in WooCommerce
Creating an effective newsletter popup goes beyond technical setup. To ensure success, following industry best practices that promote user interaction and prioritize their browsing experience is crucial.
- Add an Appropriate Headline and CTA: Your headline should be attention-grabbing, and your call to action (CTA) should be clear and compelling. Use action-oriented language to encourage sign-ups.
- Add an Appropriate Image: Images can convey a message quicker than words, but make sure they align with your brand and the message you’re trying to convey.
- Implement Personalization: Customize your messaging for individuals by using their first names or referencing past interactions. This personal touch significantly enhances engagement and fosters a stronger connection.
- Provide a Value-Adding Lead Magnet: Instead of a generic “Subscribe to our newsletter,” offer a valuable lead magnet such as a discount, free product, or exclusive content in exchange for their email address.
- Design an Opt-Out Button: Always include a clear and easily accessible option to close the popup. This shows respect for your users and can help build trust.
- Launch the Popup at the Proper Time: Timing is everything. Show your popups at the right time and to the right people. For example, you can display a special popup for first-time visitors and a different one for returning customers.
- Use Rules: Utilize rules to control when and where your email popups appear. For instance, show first-time visitors a different newsletter popup design than returning customers.
- Consistent Design: Ensuring the popup aligns with the site’s branding creates a seamless experience
Frequently Asked Questions
How do I A/B test my newsletter popups?
To optimize your newsletter popups, follow these steps:
Define Your Goal: Increased sign-ups, higher CTRs, or reduced bounce rate.
Identify Variables to Test: Design elements (headline, body copy, color, image), timing and triggers, and offers or incentives.
Set Up Your A/B Test: Use a tool like Google Optimize to create variants and split traffic.
Analyze Results: Track key metrics (sign-up rates, CTRs, bounce rates) and implement the best-performing variant.
Continuously Test and Optimize: Regularly test different elements to improve performance.
Do popups really increase email sign-ups?
Yes, popups can significantly increase email sign-ups. When implemented strategically, they can capture user attention and encourage more people to subscribe to your email list.
However, it’s crucial to use them judiciously. An intrusive or poorly timed popup can negatively impact user experience.
What should I do with my subscriber list?
Your subscriber list is a valuable asset. Use it to send regular newsletters with updates on your newest products, exclusive deals, and other valuable content. Consider setting up automated email campaigns for abandoned cart reminders and post-purchase follow-ups.
Can I target specific audiences with my newsletter popups?
Yes, targeting specific audiences is possible with newsletter popups in WooCommerce. You can create different popups for various user groups based on their behavior, location, or demographics. This allows you to personalize each user’s experience, increasing engagement chances.
Can I integrate the newsletter popup with my email marketing platform?
Yes, ShopLentor is designed to integrate seamlessly with various email marketing platforms. You can connect your newsletter email subscription popup to your preferred email marketing service to effortlessly capture and manage subscriber information.
Conclusion
Adding a newsletter popup to your WooCommerce store is not only easy, but it can also significantly impact your business. With the right strategy and implementation, a newsletter popup can help you grow your email list, improve customer engagement, and ultimately increase sales.
Remember to keep your popup visually appealing, offer a valuable incentive for signing up, and be strategic in timing and placement. And don’t forget to test and optimize your popup regularly to ensure maximum effectiveness.
But with so many options available, how do you choose the best popup solution for your store? Look for a popup tool like ShopLentor, which has advanced customization features and seamless integration with WooCommerce. This will help you create a popup that truly works for your store.
Are you ready to take your email marketing strategy to the next level? Add a newsletter popup to your WooCommerce store today and watch your business thrive!